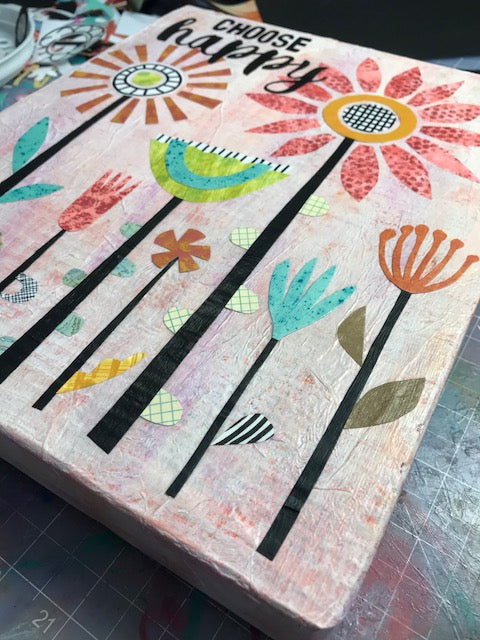
Choose Happy - Week 6
We all have a choice.
We can either see the world
As a terrible, awful, scary place,
Or as a wondrous, magical, happy one.
I choose happy!

This week I had a great time creating my newest piece, Choose Happy. I am jazzed about how it turned out! So I thought I would share with you, a bit about the creation process.
A week or so ago I painted some new papers that I really like and Choose Happy is created almost entirely with these papers.
To create these textures I used solid color paper, acrylic paint and stencils.
I really appreciate the convenience of the dabbers on the Tim Holtz Distress Paints so they were the paints I grabbed first...but I also used acrylics dabbed onto a sponge.
The stencils that I used, I bought years ago, so I don't who makes them - but really, almost any stencil will work. I used the same stencil pattern, repeated again and again. I don't get hung up on perfection. The inconsistency of the dabs is what gives texture, interest, and character.

The color combination of the paper and paint is important to me. I tend make decisions on which papers to use in a collage based almost solely on the color. So I like to put similar colors together.
The base of Choose Happy is a 2"x12" piece of wood that my husband cut and sanded for me. I recently started using scraps of wood for my collages and I really like the look and feel of it.

For the background, I started by painting the entire board white. After that dried, I added some torn pieces of dictionary pages with mod podge and then used pink (2 shades), pale yellow, and orange acrylic paints that I blended with my paintbrush and a paper towel.
I really liked the look of the background, but it was too bright for the flowers that I wanted to put on it, so I then white washed the entire board to make it more subtle.
After the background was done, I started to cut out flower pieces and parts using the papers that I had created the week before. 
Cutting and laying out the flowers involved a lot of trial and error. I cut out many shapes and laid them out on the background, then rearranged, and cut more shaped, and rearranged and cut more shapes, and rearranged until I had an image that I felt good.

Next, I glued down the flowers. While the mod podge was drying, I cut out various sizes and shapes for the flower's leaves and then decided where to place each leaf.
I also determined that I wanted to add the words "Choose Happy in the top left corner to create a focal point and to include a happy message as a part of the artwork. The letters were handcut and the most tedious part - but I do love how they turned out.
I hope you like it too!
Make it a HAPPY day!

PS - As with all the pieces that I create this year for the One a Week Art Challenge, the original is not available for sale until January 2019 when I host my celebratory art show.
PSS - I do have prints available of this happy little number.
If you are interested in a print, click here.